How to Make Laptop Not Sleep: Windows and Mac Settings Explained
Knowing how to make laptop not sleep is useful for anyone running long file transfers, rendering video, or monitoring a process that must stay active for hours without user input. By default, both Windows and macOS enter a low-power state after a period of inactivity to protect battery life, but that same default interrupts work when the task does not require the keyboard. A few targeted changes inside the operating system settings panel resolve this in under two minutes.
Understanding how to keep computer from going to sleep also matters for desktops connected to external displays. When a screen blanks mid-presentation or a server task drops because the workstation idled out, the fix is the same regardless of hardware form factor. The goal is to prevent windows from sleeping during active tasks while still allowing the display to power down when genuinely unused. How to make your computer not go to sleep and how to keep windows from sleeping are slightly different concerns: the former addresses the CPU and RAM state, while the latter specifically targets the Windows operating system power plan that governs both.
Step-by-Step: Adjusting Power Settings on Windows
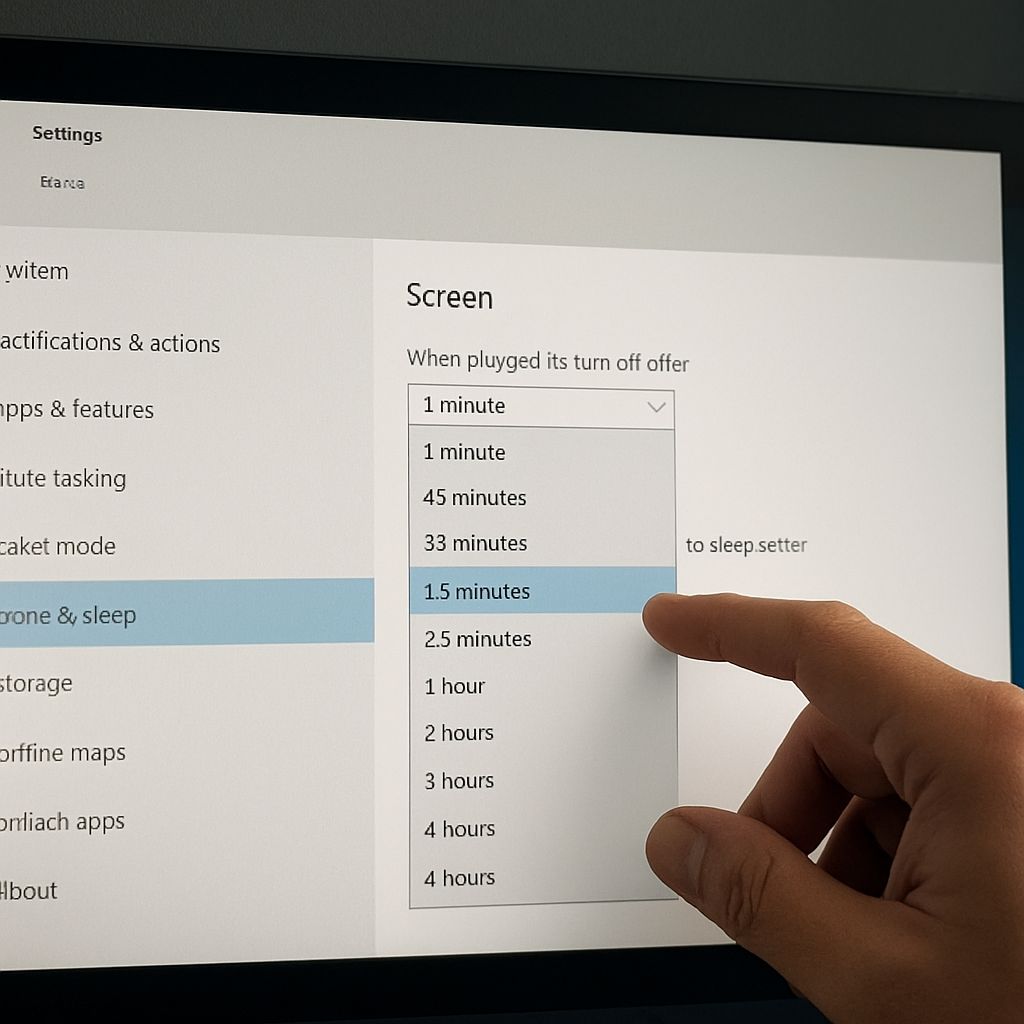
Open the Start menu and type Power & sleep settings, then press Enter. Under the Sleep section, two drop-downs appear: one for when the device is on battery and one for when plugged in. Set both to Never to prevent windows from sleeping during active use. For finer control, click Additional power settings in the right panel to open the classic Power Options window. Select Change plan settings next to the active plan, then set Put the computer to sleep to Never on both the battery and plugged-in columns.
For users who need temporary control without changing global settings, the built-in Powercfg command provides a command-line method. Opening PowerShell as administrator and running powercfg /requests shows which processes are currently requesting that the system stay awake. Running powercfg /change standby-timeout-ac 0 sets the plugged-in sleep timeout to zero, which is equivalent to Never in the GUI. Reverse the change by replacing 0 with the desired number of minutes, such as 30 or 60.
Step-by-Step: Keeping a Mac Awake
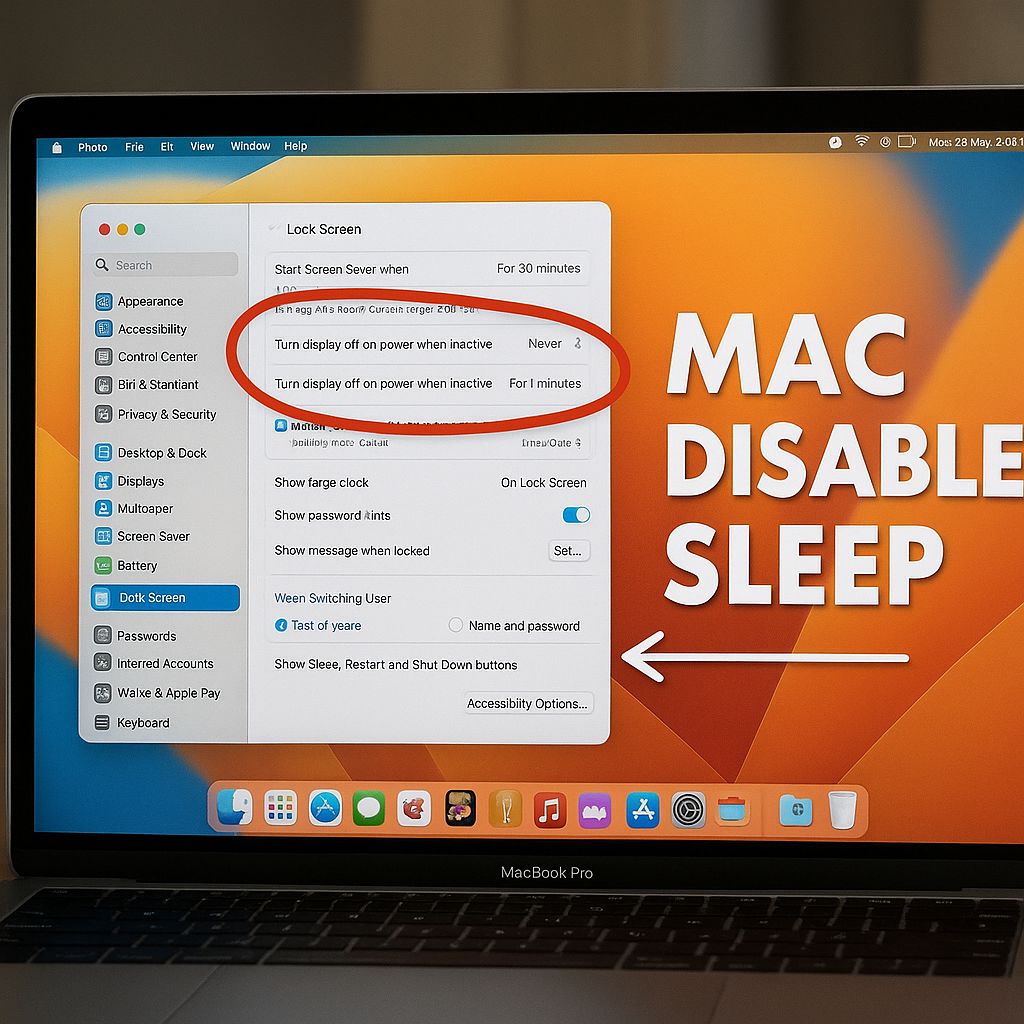
On macOS, open System Settings, navigate to Battery or Energy Saver depending on the macOS version, and locate the slider labeled Turn display off after and a separate option for Prevent automatic sleeping when the display is off. Dragging the display slider to Never keeps the screen active. Checking the prevent automatic sleeping option stops the CPU from entering sleep mode even after the display blanks.
For task-specific control on Mac, the free built-in tool caffeinate runs from Terminal. Typing caffeinate -d prevents the display from sleeping until the Terminal window is closed. Typing caffeinate -t 7200 keeps the machine awake for exactly two hours before reverting to normal behavior, a clean option for a single long render without permanently changing system preferences.
Scheduled Sleep vs. Always-On: Balancing Power and Productivity
Leaving a laptop or desktop fully awake around the clock accelerates wear on the SSD and fan bearings and raises the monthly electricity bill by a measurable amount, typically 30 to 60 watts of continuous draw compared to near-zero in sleep mode. A practical middle ground is to disable sleep only during working hours using Task Scheduler on Windows or Automator on Mac to run a power-plan switch at a set time each morning and revert it each evening.
Display sleep and system sleep are independent settings. Keeping the display off while the CPU stays active saves 20 to 40 watts on most laptops, which matters if the machine is plugged into a battery pack or UPS with limited capacity. Setting the display to turn off after 10 minutes while setting the system to never sleep gives the best tradeoff for unattended tasks.
Bottom line: The fastest way to make a laptop not sleep on Windows is through Power & sleep settings, where setting both sleep timers to Never takes under 60 seconds. On Mac, the caffeinate command in Terminal gives immediate, temporary control without touching global preferences. Either approach stops the computer from going to sleep mid-task without any additional software.